Friday, October 30, 2020

3d Modelling reflection

My past experience with digital 3D

In the past I have worked with 3D to expand my range of creative abilities and I mainly used Blender and dabbled with Marmoset toolbox create an interactive turntable for my portfolio.

The main finished piece I made in blender was a low-poly wooden shack diorama as seen in the video above but I didn't know how to do UV unwraps or how to add textures to my model.But it was a good starting point.

The tables and chairs 


This was my first time using 3DS max and this was the main obstacle I had to overcome for this task, the modling I found fairly easy and understood what I had to do but what I struggled with was translating what I knew from Blender over o 3DS max , The main frustration being the difference in the shortcut keys which I had grown use to when using Blender. 


The dagger task


This task was easier as I grew used to the software and I decided to try my hand at unwrapping and although it looked complicated I found that once I knew what to do it was relaxing almost as it was like a puzzle . If I  were to go back and do this again Id customise the dagger a bit to have a more interesting design and push myself a bit more.


The chest modeling

I was quite confident when modelling the chest as I was now comfortable with the software and was more familiar with different functions as I ended up just trying them out on a throwaway model to just see what they did so I could have a better idea of what I have at my disposal to use.

I am overall quite happy with the end result of the chest and I think if I were to improve it I would just add more smaller details such as a plaque on the front that could end up being a danger sign or something along those lines to make the chest seem more interesting.

UV unwrapping the chest was a challenge as it had multiple different part but I found it interesting trying to figure out where to put seams for it to unwrap properly and packing them all at the end, although I did mess up in some places such as the handles as to save on space I lay the two handles meshes on top of each other so that one texture would apply to the both of them but I didn't check on what way up I laid both meshes and didn't check whether they were both the right way round that I had to fix later on .


Chest texturing


Quick design explaination

For my chest I wanted to go for a theme of pagan symbolism , the rams head that I tried to make look roughly painted on the front is symbolic of the god Cerberus who is a pagan deity and the symbols along the seams of the chest are representative of the four elements. This more mythical theme is what informed the shapes in the texture of the wood as the swirls and flow in the wood has a fantastical feel which complements the design.

Evaluation

The wood texture was hard for me to do as I kept making it too small and when I kept testing it on my model (which I did throughout so I didn't make a mistake and go to far to correct it ) it was hard to see and pixilated so I tried to make my brushstrokes bolder and thicker which worked . To save on time and avoid running into any more issues I only painted half of the back and then mirrored the pattern and flattend to make it one layer, this was then used for all the other areas of wood which kept the pattern consistent and saved a lot of time.

I think overall the texture of the wood worked best and had interesting pattern that helped give the chest a more fantsy feel although I could have tried more colour variations by laying over a secondary gradients so I could experiment more. I think I should have gone back in and added some texturing on the metal or add scuffs as I didnt want slashes in my chest because that would make it too beaten up and thats not what I wanted but a scuff here and there around the close or o the feet would have made it look more used as it would make sense that a chest would have more damage on the feet than the main area due to being moved around  


Development based on evaluation


Thursday, October 29, 2020

tiling and alpha textures( write up in progress)

Tiling texture


 The first thing I did for this task was research images of bark so I had a reference to go off instead of working from imagination which would increase the chance of inaccuracy.


I noticed that the bark sometimes overlaps and the shapes are all asymmetric and rough. within each segment there is often breaks and cracks often were the bends in the shapes are.

I've also noticed that the width of the cervices vary from tree to tree so I can change this as I want. The rougher texture could be built up through using more rough paint strokes and less smooth blending which would create harsher edges.


Initial sketch

I referenced the image with the deeper cracks for my texture. I started out by just doodling a jigsaw of mismatched shapes, some that overlap and some that bend and twist to create some varition in the texture. 

I think I did make some segments a little too small which ended up making parts of the texture look a bit busy and if I  were to redo it I would make them bigger so the texture flows better in the end.


Shading
I used a basic hard round opacity brush to work more into the cracks to give the bark more depth which I also tried to blend out slightly onto the segments as I noticed with the wider crevice bark the segments have a more gradual fade to darkness.

I also added some random bits of darkness generally to quickly create a variation of levels within a currently flat piece without having to think too much .

Here I returned that background back to what I was ad changed it so allow you to see the sketch a bit clearer. Here I went back in adding some cracks here and there and throwing in some highlights which really helped to push that feeling of depth further and making it more readable.

I particularly wanted to put highlights on the edge of cracks to add some contrast and extenuate the depth of the cracks a bit more.


Colour gradient

To finish I added a gradient map on top to add colour across the tonal painting. I had to mess with the sliders to get it to match the shading and have it it blend smoothly from one colour to another.

Overall I am happy with the outcome however I do think I should have and a bit more blending on the highlights as its a bit too rough for my liking right now.


Alpha textures


Painting the branch was a simple task as I roughly sketched out a branch silhouette and then filled it in with some shading and threw a gradient map over top.
image


these leaves were based off red bud leaves which have a cordate shape, I built up the tones in grey scale at first so I could focus on the contrast rather than fretting bout colour theory. I added colour later using gradient maps and I tried out a few different options 

I think I could still improve however, the contrast on the leaves could be exaggerated more to give abetter sense of depth within each leaf.putting more work into the creases of the leaf would also help refine the shape and details of the leaf further.

After painting the leaves I then when onto arranging the leaves and putting them onto the branch, I used various sizes to try and give the illusion of some leaves being on branches further back so the final product is more realistic. I also made them a bit darker which again helped to give it that more layered effect.


Friday, October 16, 2020

Inspiring 3d work

 A likeness study from Christoph Waltz as Hans Landa from Inglorious Basterds movie, by Marlon R. Nunez

The reason I admire this work is because of its realism, the way the artist has painted the skin has given the illusion of layers and depth. Since real skin is not one flat colour, it is important when creating realistic models to include the undertone colours, especially in the face where it can be prominent which you can see in the eye area in this piece.


Also you can see were the artist has added colour to the beard area which is a nice touch to show where the hair follicles are in the face even if he is clean shaven.


Thursday, October 15, 2020

Line and weight exersize

For this still life exersize I created a basic set up which is pictured to the left and I drew it from multiple different angles . 


Speed drawings


These quick sketches turned out quite well as I think I managed to capture the main shapes within a short amount of time. To do this I tried to avoid focusing on the smaller points and details and first look at the larger overall shapes and get them down first.


Mark making drawings

These drawings ended up moving into tonal drawing rather than line drawings since I didn't know when to stop and the lines ended up overlapping a lot and turning into shading and if I were to go back Id make sure to stick to line drawing only.I think I did manage to accurately recreate the scene in front of me . There is a bit of asymmetry in the bottles in the drawing on the right and the centre. This could have been avoided by drawing a line down the centre and making sure each side matches which is what I did for the drawing on the left and this ended up being much more symmetrical. In the drawing on the left I tried to incorporate more line weight into the drawing and this payed off well in the leaves especially as the only out line of the leaves is made up of small dashes and yet you can still see the shape well .

I decided to go back in the the two on the right and try and erase some tonal shading and instead use more line work, the drawing on the far left would not erase clearly so I wasnt able to do anything to it.


these ones worked out quite nicely, although there are some areas that have more tonal shading as it was hard to erase, I used circles for the first one and topology lines for the other which out of the two I think the circles worked best but the topology lines did work best in the rose and I think a mix of the two would be really interesting to see.

Blind contour drawings 


These were challenging since I wasn't able to look at the paper and I must admit that I did slip up once or twice and peeked  at the page but overall I am pleased with the outcome. I've done this exercise before so I had an idea of how to make it still look like a coherent image but I think it is still messy and inaccurate .


Final Piece

For this final piece I tried to use continuous lines so create some tone , these are ones similar to what you find on maps and I think they turned out quite well. I laos think the use of line weight in ghe steam and leaves worked well to not only inform the shapes of the object but also bring attention up to the head of the rose which I wanted to be the main focal point.

I think the main improvement I could have made would be putting more time into smaller details such as the markings on the wooden boxes as it established the top box well but the bottom box looks a bit plain and underdeveloped overall. 

Another point I think worked well was how the line weight reduced the further from the head of the rose you get, this was to pull the attention towards the detailed rose .


Wednesday, October 14, 2020

Landscape exercises

A lonely grave sat upon a hill

This was my first attempt at the tonal block landscapes and I ended up relying on the shapes more than I would have liked to, I like the end product and I tried to stillhave an elemt of story to the piece even if its just a simple exercise as I prefer to put some kinda of storytelling into things I have freedom with  and  I think that it did come across here. 
 The shading on the grave I think helped the simple stone siluhette that I used be more recognisable s a grave rather than just a rock and the brush I used had some texture that complemented the texture of a stone so it wasn't just a block of light.


church landscape based on one from my hometown


In this one I mainly used shapes for the background and pained the archway myself based off a real church arch from my hometown seen in the reference below, but I tried to simplify it as much as possible and use only two shades.


Hidden garden 

 
In this piece I used more of a mix of painetd details and shapes to help build the scene. I wanted to try and include more texture in this one which you might be able to see from the shed building in the background and the path leading up to the arch. This piece however I think could be improved by adding some more highlights to have more contrast in the scene as it feels a bit flatter than I'd like it to be.

Caravan under the clouds


For this piece I wanted to use really simple shading and shapes, focusing more on the flow of the shapes and not relying on complicated shading and textures to communicated form. Although it does look simple I still like this piece as it has a nice flow to it and and the contrast really helped to better inform things such as the shape of the caravan and the fence in the foreground, but if I were to re do this I would try an add more detail into the grass and it doesn't look three dimensional.

Starry wanderer


This was the last piece I did and I tried to tie together what I learnt from the other pieces such as having very simple shaing in some areas and more texture and detail in others which helped to direct attention towards cetain areas such as the little rodside shop and star street lamps. I also used tone to direct the attention along the path as the street lamps with the bright white stars all lead down the path to the small figure which I also painted in a pure white. 

I was very happy with the way I was able to use details such as small light particles around the stars to make the scene look more magical and I also think i did well with the effect of the lights on the stall and sign board as the street light would cause light to reflect off the side so including this helped set them in the scene much better.

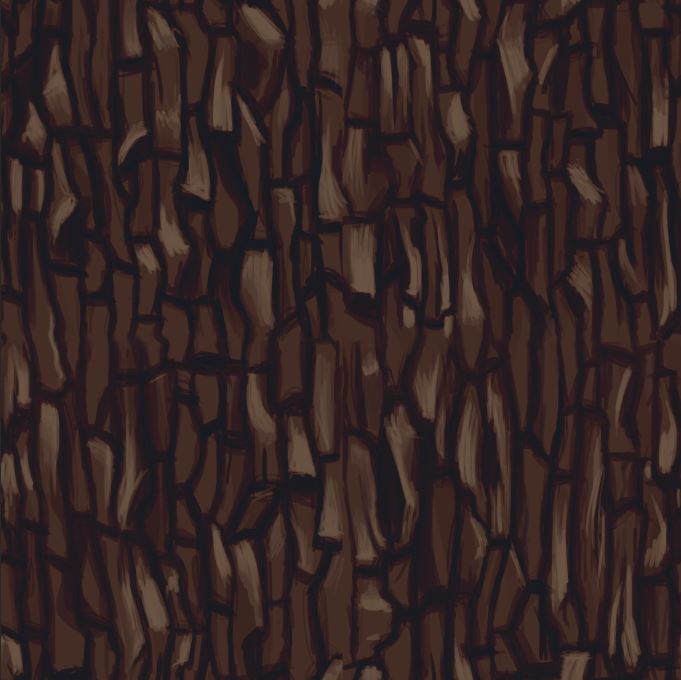
I tried to make the trees look more intresting by having the trunk twist and have swirling bark pattern throughout as it gives it a more fantasy like feel which helped inform the kind of setting the scene was in .


Overall I am quite happy with the tonal landscapes I did for this task as I was able to explore a range of different ways to create a scene using different techniques and the last piece was a good way for me to pull them all together and learn from the mistakes I made in the ones before.